This is the part number 7 of my LibreOffice Tutorial to learn about simple useful formulas and a tiny bit of macro to make a simple daily agenda.
This time we are finally going to do our very first and very simple LibreOffice Macro.
Other parts:
In Part 1 we look at renaming a sheet, entering some random data, formatting cells and starting to build the logic of the agenda.
In Part 2 of this tutorial we write some time functions and IF formulas.
In Part 3 of this tutorial we learn about nested IF and AND function.
In Part 4 of this tutorial we learn about VLOOKUP.
In Part 5 we look at how to create and use a ‘named range’.
In Part 6, we learn the INDEX function.
In Part 7, we learn how to code a (very) simple LibreOffice Macro.
In Part 8, we use the MROUND function to round the time.
In Part 9 part we do some debugging and learned about the ISERROR and NOT functions.
In Part 10 part we add some color and formatting to wrap-up this series.
I you followed my tutorial and did everything correctly you would have notice something annoying…
The current activity does not update by itself unless you change something in a cell or do a ‘recalc’ of the spreadsheet.
Our first macro is going to be to have the time refreshed every time we click anywhere on the spreadsheet, therefore updating the display if needed.
This is going to be an event based macro and the event will be the click mouse button.
First of all, let’s display the current time on our Now! spreadsheet 2 cells above the activity before the previous activity, so in C4:
=TIME(HOUR(NOW()),MINUTE(NOW()),SECOND(NOW()))
(this formula is detailed in tutorial 2)
It should display the current time, BUT the time stays the same indeed unless you enter something in a cell and press enter, or press F9 (or menu Data>Calculate>Recalculate) to recalculate the entire sheet.
So let’s create a macro to do the recalculation with just one click.
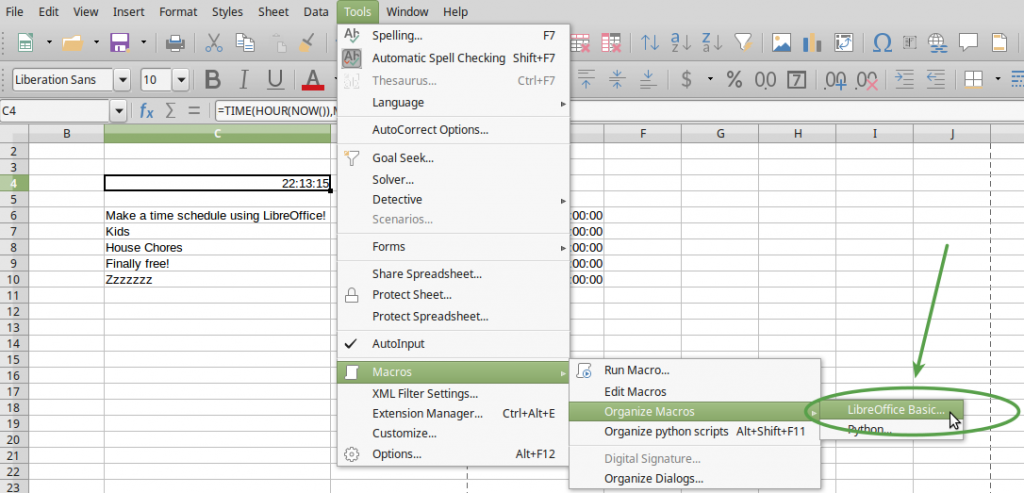
To create the macro, go in menu Tools>Macro>Organize Macros>LibreOffice Basic… as shown in the picture below:
It will open a new window.
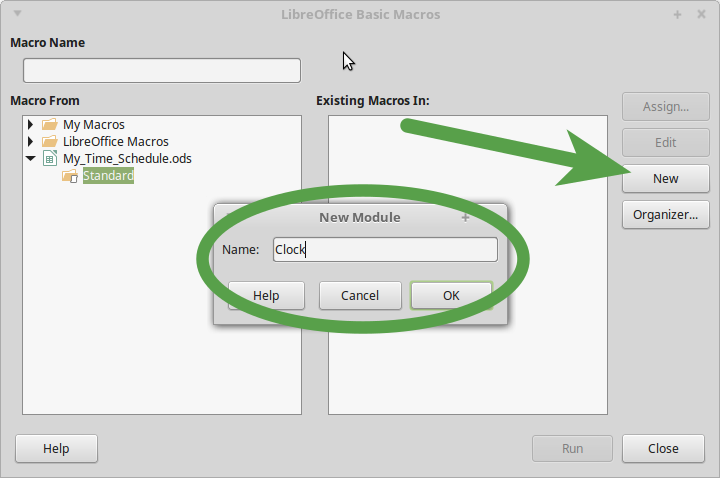
In the section Macro From select and expand the entry with your file’s name, (in this tutorial ‘My_Time_Schedule.ods’), click and Standard and click on the New button, and in the New Module popup window replace Module1 by Clock. You can leave Module1 if you want or choose another name for this new module, it is good practise to choose a relevant name though, in order to remind you what the macro does without having to edit it.
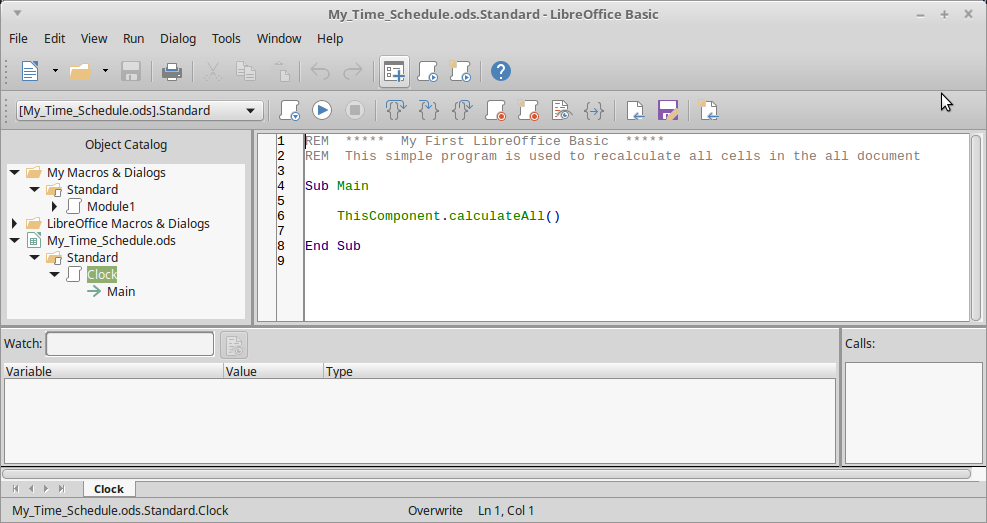
Once you have renamed the Module and clicked the OK button you will get the LibreOffice Basic Editor window.
It looks like a text editor with an Object Catalogue on the Left hand side, a few buttons at the top and a couple of other sections at the bottom.
So in the main section of the LibreOffice Basic Editor you should see a program called main, that looks like that:
REM ***** BASIC *****
Sub Main
End Sub
The REM instruction is only to put comment in your code.
The program itself is called a Subroutine and is by default named Main.
We can keep this name, in many programming language ‘main’ is usually the program that is first run. And usually the ‘main’ program calls and executes other programs.
(if you want to learn a bit more about LibreOffice Basic you can start with https://help.libreoffice.org/Basic/Basics )
The function to recalculate all cells in LibreOffice is calculateAll() and we are going to run this function for what is called the currentComponent, meaning our entire spreadsheet in our case.
This is how our simple macro should look like:
REM ***** My First LibreOffice Basic *****
REM This simple program is used to recalculate all cells in the all document
Sub Main
ThisComponent.calculateAll()
End Sub
So now we can run that program by going to menu Tools>Macro>Run Macro, select the macro and click on the button Run… And magically the time is updated, along with the current activity if we were starting a new one.
Wait a minute… we said we were going to only need to click once tu update the time displayed!
This is because we are not finished yet…
The next step is to assign the macro to an event listener, that would trigger the macro when an event occurs.
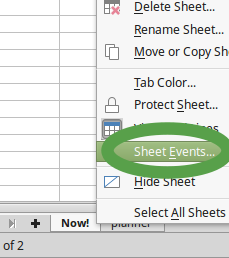
To do that we need to right click on the Now! spreadsheet tab at the bottom of the window and select Sheet Events from the context menu displayed:
From there, we select the entry Selection change, that is because we want the macro to be run every time we click anywhere on the spreadsheet. The so called ‘listener’ program is waiting for any selection change to happen to run the macro assigned to it.
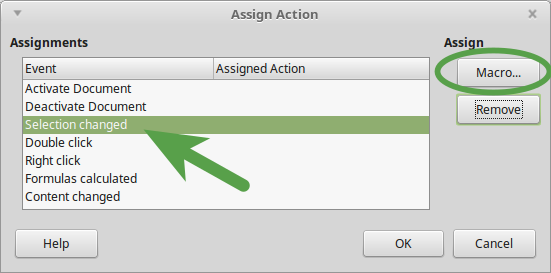
Simply select the Main Macro from the Clock module of your spreadsheet and click OK.
Go ahead and click anywhere, and you’ll see the time in cell C4 changing.
Save your document!
Some would argue that time should change automatically like a real clock. It is possible to do and it would require more complicated settings. So I think it is not really useful to implement a live clock, this is only a spreadsheet after all and you only need one click to update the time and the schedule.
In the next part of this tutorial we will do a few tweaks and look at function MROUND.
If you like this tutorial, you could buy me a coffee to help me continue writing add-free tutorials.
Thank you!
Related Posts
 Assign Your Python Macro to a Button in LibreOffice Calc
 LibreOffice Calc & Python Programming: Part 1 – Requirements
 Embedding vs. Storing Python Macros in LibreOffice
 Write ‘Hello World!” in LibreOffice Calc using Python
- LibreOffice Calc & Python Programming: Part 2 – Hello World
 LibreOffice Calc & Python: part 9 – Reverse the order of cells content from a cell range